ページネーション
Railsのindexアクションは複数のモデルが格納された配列が返ってくる。
通常のPost.allのような取得の仕方をした場合、データベースに保存されている全てのPostが返される。
コンテンツが増えてくると、膨大な情報になってしまうので、1ページ目のコンテンツ、2ページ目のコンテンツと ページ分けして返すようにする処理が必要になってくる。
このように、コンテンツ一覧をページで指定して、返す仕組みをページングと呼ぶ。
Railsプロジェクトでページング処理が可能になるGemをインストールする。
bundle add kaminari api-pagination
次にapi-paginationの設定ファイルを作成する。
touch config/initializers/api_pagination.rb
中身をこのようにする。
ApiPagination.configure do |config|
  # If you have more than one gem included, you can choose a paginator.
  config.paginator = :kaminari # or :will_paginate

  # By default, this is set to 'Total'
  config.total_header = 'X-Total'

  # By default, this is set to 'Per-Page'
  config.per_page_header = 'X-Per-Page'

  # Optional: set this to add a header with the current page number.
  config.page_header = 'X-Page'

  # Optional: set this to add other response format. Useful with tools that define :jsonapi format
  config.response_formats = [:json, :xml, :jsonapi]

  # Optional: what parameter should be used to set the page option
  config.page_param = :page
  # or
  # config.page_param do |params|
  #   params[:page][:number] if params[:page].is_a?(ActionController::Parameters)
  # end

  # Optional: what parameter should be used to set the per page option
  config.per_page_param = :per_page
  # or
  # config.per_page_param do |params|
  #   params[:page][:size] if params[:page].is_a?(ActionController::Parameters)
  # end

  # Optional: Include the total and last_page link header
  # By default, this is set to true
  # Note: When using kaminari, this prevents the count call to the database
  config.include_total = true
end
ページネーションはRailsのコントーローラーの中でもモデルを配列に入れて返すようなindex actionでしか利用しない。
なので、今の所の変更点はposts_controller.rbの def indexに限られる。
render json:をpaginate json:に変更するだけで利用できる。
def index
  @posts = Post.all.order(created_at: :desc)

  paginate json: @posts, json_for: :list
end
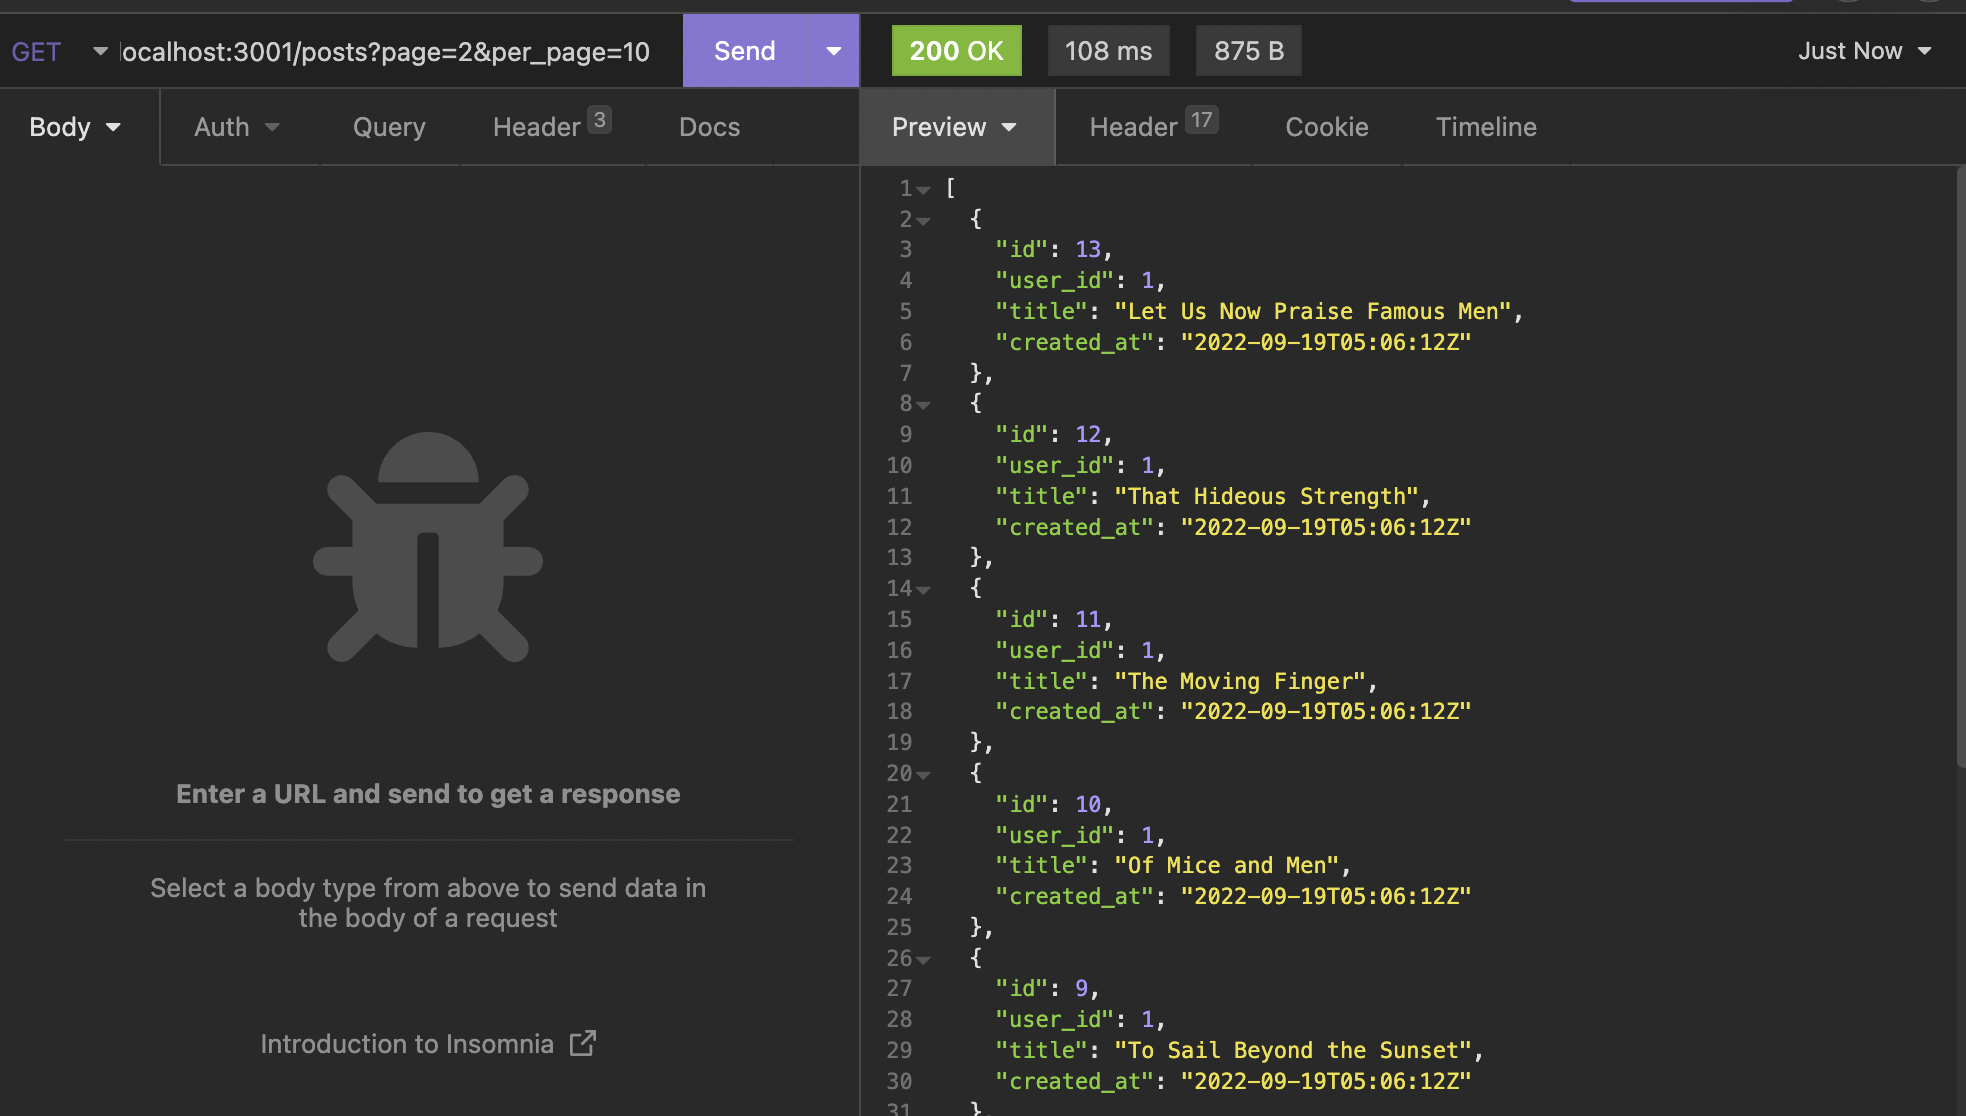
paginateに変更すると、クエリーパラメーターのpageとper_pageを受け取れるようになる。
pageはページ番号、per_page は1ページあたり何個コンテンツを返すかを指定する。
例えば ?page=2&per_page=10 とした場合は、2ページ目の10個のPostを要求する。
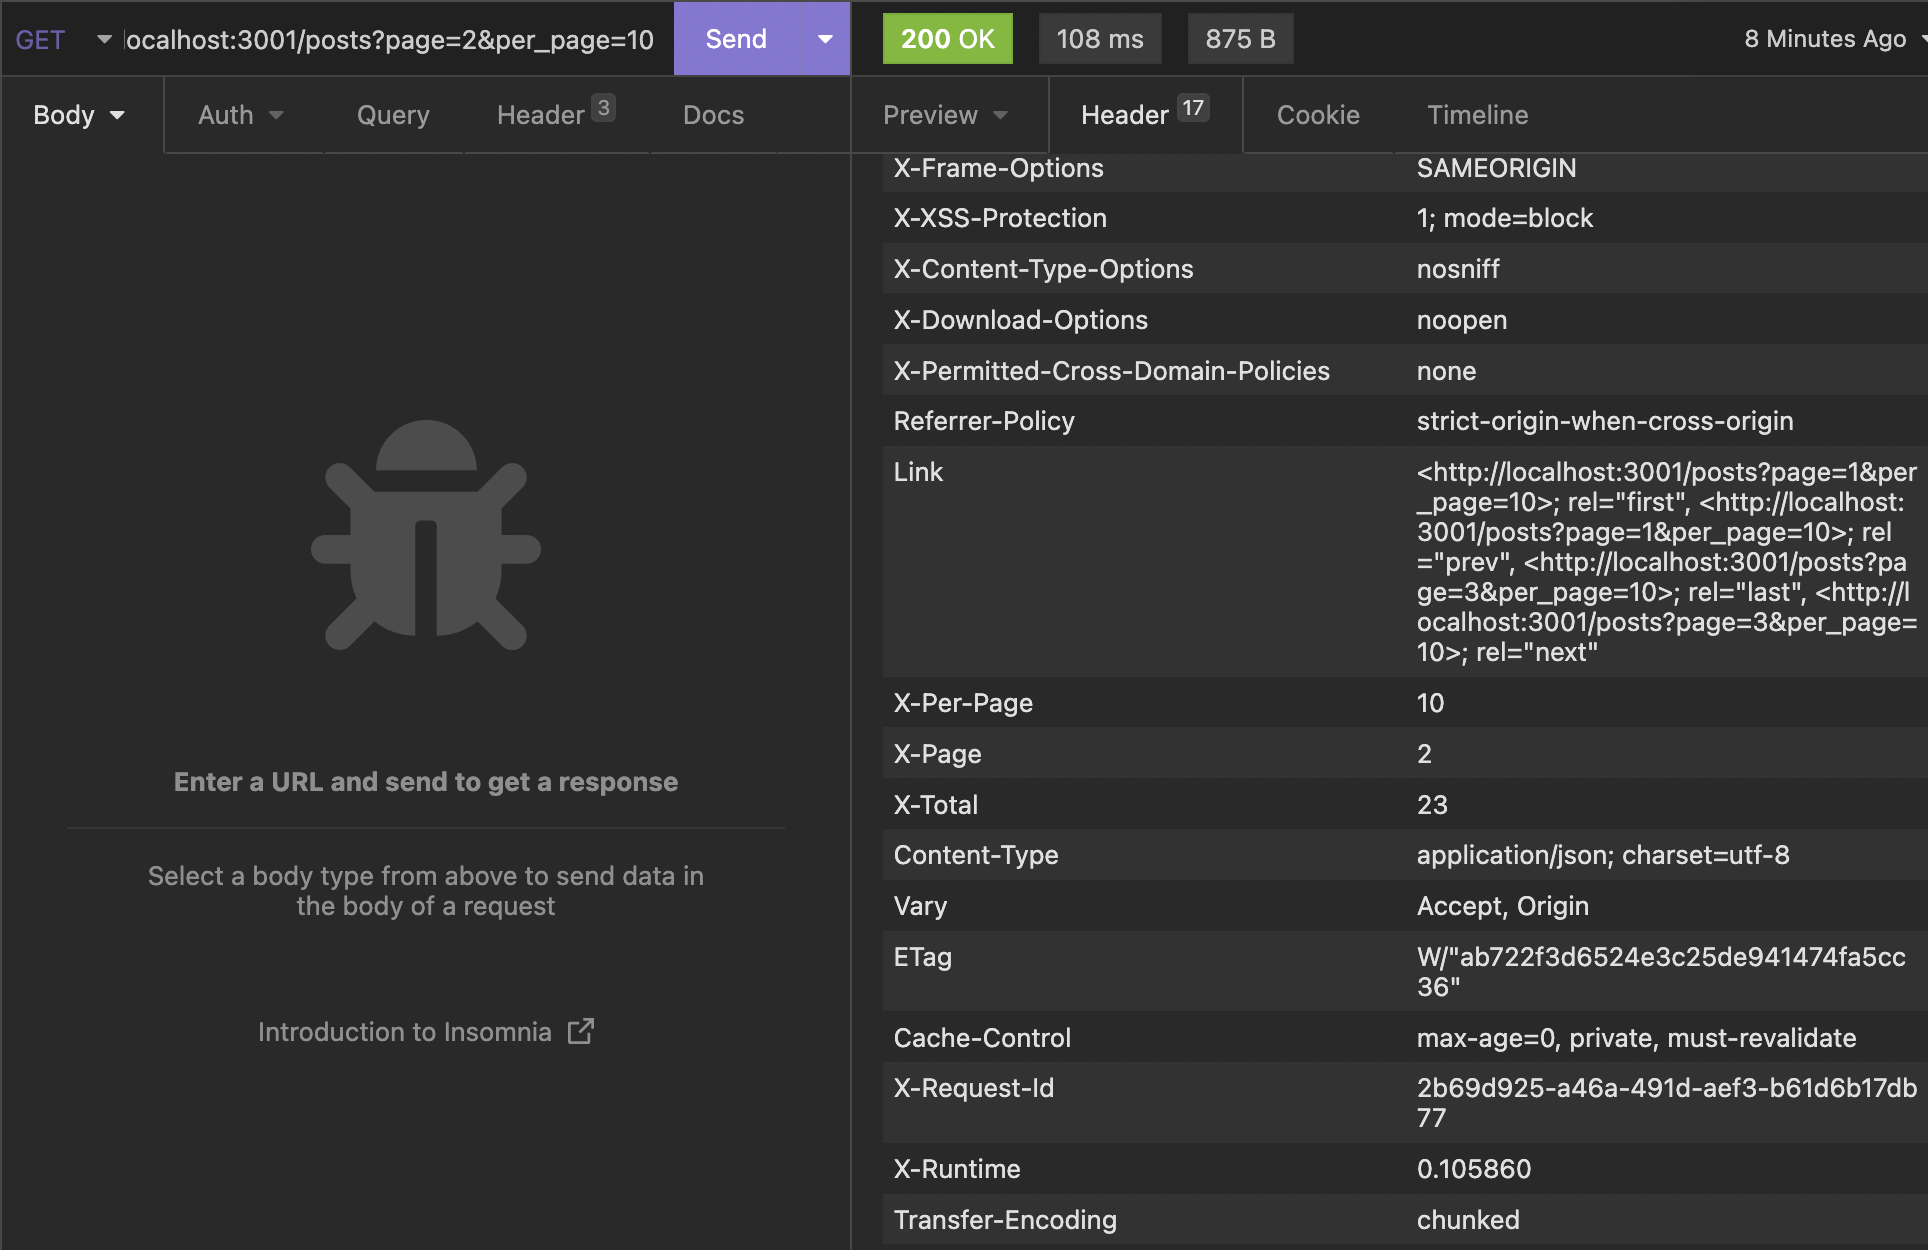
クライアント側では受け取ったデータの総数が分からないのとUIの実装が大変である。 api-paginationはそれらページに関わる情報をHeaderに収めているので、それを参照する必要がある。
戻ってきた情報のHeaderをみると、X-Per-Page 10, X-Page 2,X-Total 23のような値がある。
これを利用してクライアントではページネーションを組み立ていく。
最後に、これらHeaderをaxiosが受け取れるようにするための設定をCorsで行う。
Rails.application.config.middleware.insert_before 0, Rack::Cors do
  allow do
    origins '*'

    resource '*',
      headers: :any,
      expose: ["access-token", "expiry", "token-type", "uid", "client", "x-page","x-total", "x-per-page"],
      methods: [:get, :post, :put, :patch, :delete, :options, :head]
  end
end
Railsサーバを再起動しておく。
git add .
git commit -m "Create a api pagination"
Next.js側に移動して、ページングを含めたUIの実装を行う。
ページングの処理は大きく分けて4つある。
- Googleのように
< 1 2 3 4 5 6 >番号と前後への移動を含めたUI - wordpressのように
first prev next lastみたいに現在のページから見て相対的に移動するUI - スタートは常に1ページからタップボタンで2ページ目、3ページ目とコンテンツを加えていく方法
- スタートは常に1ページで、インフィニティースクロールでコンテンツを加えていく。
ここでは比較的実装が簡単な3番のタップでコンテンツ読み込みを実装する。
getPosts関数にページの引数を受け取れるようにする。
export const getPosts = (page, per_page) => {
  if (!Cookies.get('_access_token') || !Cookies.get('_client') || !Cookies.get('_uid')) {
    return client.get(`/posts?page=${page}&per_page=${per_page}`)
  } else {
    return client.get(`/posts?page=${page}&per_page=${per_page}`, {
      headers: {
        'access-token': Cookies.get('_access_token') || '',
        client: Cookies.get('_client') || '',
        uid: Cookies.get('_uid') || '',
      },
    })
  }
}
ページのステートを作成。
const [page, setPage] = useState(1)
handleGetPostsを修正する。
const handleGetPosts = async () => {
  try {
    const res = await getPosts(page, 10)
    if (res?.data.length > 0) {
      setPage(page + 1)
      setPosts(res?.data)
    } else {
      console.log('Something went wrong')
    }
  } catch (err) {
    console.log(err)
  }
}
JSXのFooter DOMの上にロードボタンを設置する。
<Box display="flex" mt={30}>
  <Clickable
    onClick={() => handleGetMorePosts()}
    width={[280, null, 320]}
    height={[44, null, 50]}
    borderRadius={[44 / 2, null, 50 / 2]}
    hoverShadow="silver"
    borderColor="dimgray"
    borderWidth={1}
    display="flex"
    alignItems="center"
    justifyContent="center"
    overflow="hidden"
    mx="auto"
  >
    <Text color="gray" fontSize={[12, null, 16]}>
      もっと読み込む
    </Text>
  </Clickable>
</Box>
<Footer />

git add .
git commit -m "Create a pagination"