新規アカウント作成
web サービスの根幹である認証系から始める。認証系のプログラムはあまりに多くの処理を行わなくてはならないので、いくつかに分ている。 この章では新しくユーザーがメールとパスワードを用いて認証を行う方法を紹介する。
実装面では Ruby on Rails ではdeviseとdevise_token_auth を用いる。
devise は rails の認証を行うための Gem であり、最もスタンダードである。
devise は Rails の MVC 用のライブラリであるため、API サーバとしてユーザーの認証を行う場合は、
拡張ライブラリであるdevise_token_authを合わせて使う。
なお、このモジュールのコアとなるpages/sign_up.jsxのコードは一番下に完成系を置いておくので参照すると良い。
Devise のインストール
rails のプロジェクト内で、以下を実行し Gem をインストールする。
bundle add devise devise_token_auth
次に、devise の各種ファイルを rails プロジェクトに展開する。
bin/rails g devise:install
ひとまずこれでコミットする。
git add .
git commit -m "Install devise"
User モデルの作成と設定
Devise 経由で User モデルを作成する。 devise_token_auth が提供するコマンドでは devise 本来が作成するカラムに加えて、認証 Header の情報を収めるカラムが作られる。
bin/rails g devise_token_auth:install User auth
上のコマンドを実行すると、諸々の設定が展開される。
まずは、Auth Header のトークンに関する設定を行う。
デフォルトで、ヘッダーに収められる認証トークンはアクセス毎にリセットされる様になっており、これは何かと不便である。
あらゆるアクセスを API にする前にヘッダーのトークンを更新する処理をしなくてはならないので、安全かもしれないがこの設定をオフにする。
config/initializers/devise_token_auth.rbを開いて、一番上の設定のコメントアウトされたchange_headers_on_each_requestをfalseにする。
config.change_headers_on_each_request = false
同じファイル内のheaders_namesをコメントインして、最後に:'authorization'=> "authorization"を加える。
config.headers_names = {:'access-token' => 'access-token',
                       :'client' => 'client',
                       :'expiry' => 'expiry',
                       :'uid' => 'uid',
                       :'token-type' => 'token-type',
                       :'authorization'=> "authorization"}
次に cors で上でコメントインした headers を受けいられらるようにする。
config/initializers/cors.rbを開き、expose項目を加える。
Rails.application.config.middleware.insert_before 0, Rack::Cors do
  allow do
    origins '*'

    resource '*',
      headers: :any,
      expose: ["access-token", "expiry", "token-type", "uid", "client"],
      methods: [:get, :post, :put, :patch, :delete, :options, :head]
  end
end
Userモデルの継承元を変更する。
danger
DeviseでUserモデルを作ると、継承元がActiveRecord::Baseになる。Railsではapp/models/application_record.rbが用意されており、
そこにRailsプロジェクトのモデルの共通の設定を記述しているので、そちらを継承する。
# frozen_string_literal: true

class User < ApplicationRecord
  # Include default devise modules. Others available are:
  # :confirmable, :lockable, :timeoutable, :trackable and :omniauthable
  devise :database_authenticatable, :registerable,
         :recoverable, :rememberable, :validatable
  include DeviseTokenAuth::Concerns::User
end
最後に、マイグレーションファイルを実行して User モデルをデータベースに展開する。
bin/rails db:migrate
git add .
git commit -m "Create a User model"
ポートの変更
Rails と Next.js はどちらもデフォルトポートが 3000 番でどちらかを変更しなくてはならない。 変更した方が良い方はどちらかというと API 側だと思う。フロント側は頻繁にブラウザでアクセスするので 3001 と入力するのは少し手惑うので rails のポートを 3001 にする。
config/puma.rbの PORT に関する記述を 3001 にする。
# Specifies the `port` that Puma will listen on to receive requests; default is 3000.
#
port ENV.fetch("PORT") { 3001 }
git add .
git commit -m "Change port number to 3001"
登録機能
devise はどのような機能を利用するかをapp/models/user.rbに記述されている。
デフォルトではメール認証の機能(:confirmable)がオフになっている。
そのため、先に登録機能(:registerable)を実装してみる。
bin/rails g controller auth/registrations
app/controllers/auth/registrations_controller.rbを開いて、下のコードのように変更する。
class Auth::RegistrationsController < DeviseTokenAuth::RegistrationsController

  private

  def sign_up_params
    params.permit(:email, :password, :password_confirmation)
  end
end
最も大きな違いは、このクラスが継承しているクラスがApplicationControllerからDeviseTokenAuth::RegistrationsControllerになっていることである。
上のコードは private の関数のsign_up_paramsしか定義していないが、基本的な登録するための関数はDeviseTokenAuth::RegistrationsControllerに定義されているので、
特に変更する場合以外は上で定義されたものを利用する。
sign_up_paramsは新規アカウント作成時にフロントエンドから受け取る値である。このモジュールでは必要最低限の email とか password と password_confirmation だけだが、
アカウント作成時に、account_name みたいなのを登録したい場合はここに追加する必要がある。
作成した registrations コントローラーを DeviseTokenAuth の register コントローラーとして使うためにconfig/routes.rbを変更する。
Rails.application.routes.draw do
  # For details on the DSL available within this file, see https://guides.rubyonrails.org/routing.html
  mount_devise_token_auth_for 'User', at: 'auth', controllers: {
                                registrations: 'auth/registrations'
                              }
end
ルーティングが書き変わっているか確認する。
bin/rails routes
registrations コントローラーのパスがdevise_token_auth/からauth/になっていればうまくいっている。
devise_token_auth/registrations#cancel
↓
auth/registrations#cancel
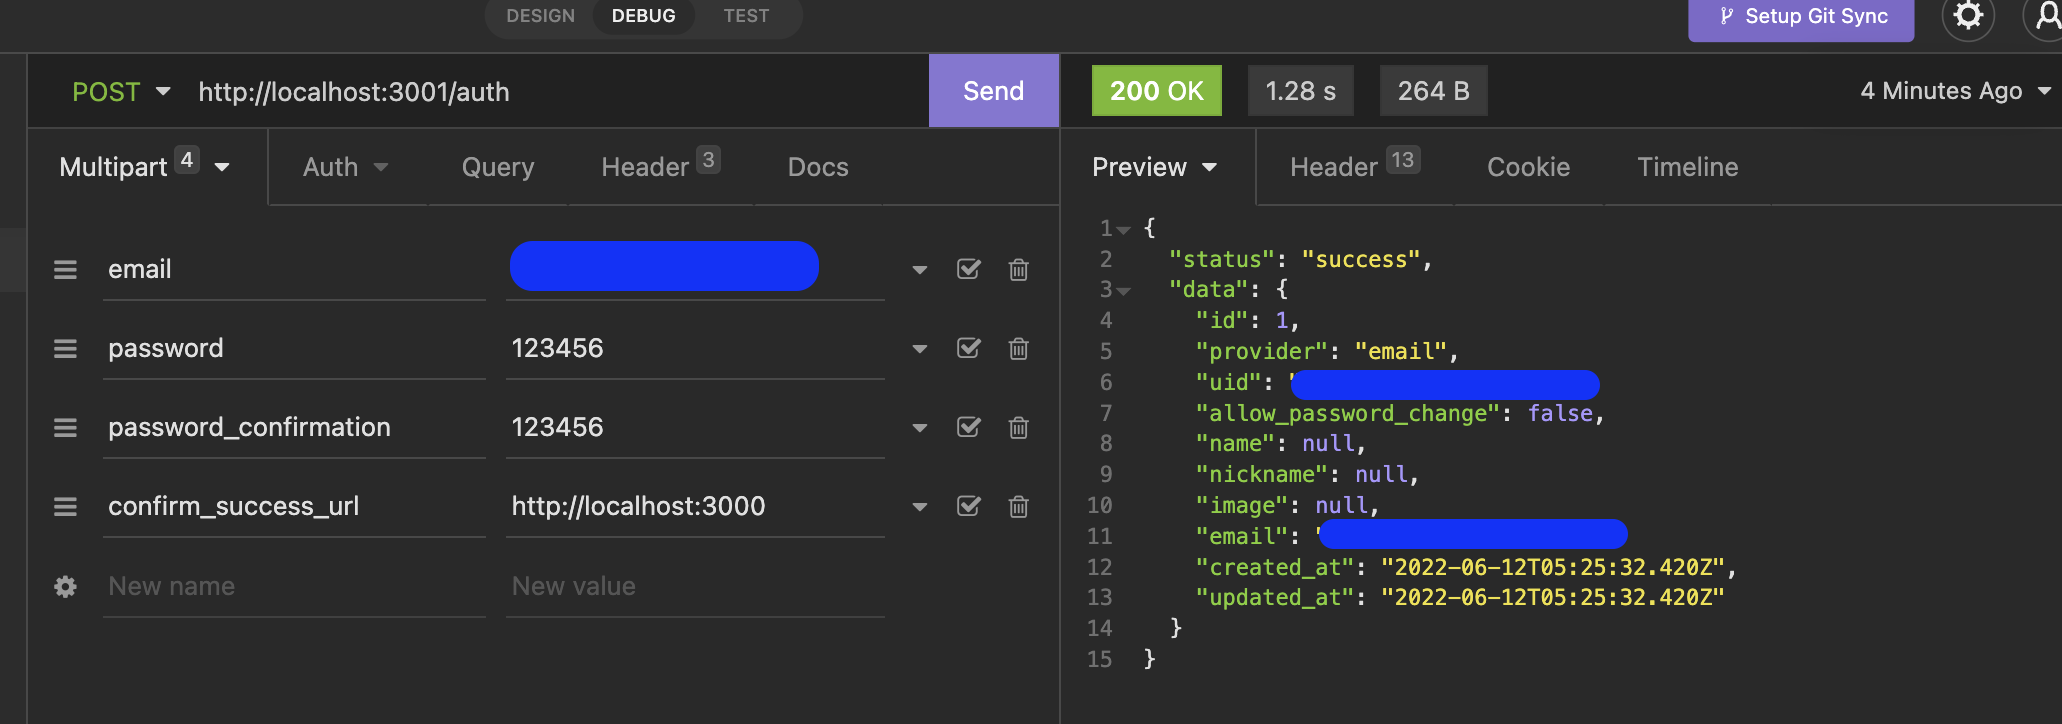
これで、auth に対して HTTP POST で新規アカウントのユーザー情報を投げればアカウントが作成される。
confirmableが無効なのでメール認証は行われず、即座にアカウントが作成される。
curl コマンドでターミナルから作成してみる。
caution
curl コマンドで email の値に gmail で使う alias 文字+を含むとその文字がそのまま空白になってしまう。
そのため、gmail のこのよなアドレス(例 alice+test@gmail.com)を使う場合は別の REST Client を使うと良い。
curl -X POST http://localhost:3001/auth -d '[email]=alice@example.com&[password]=123456&[password_confirmation]=123456'
このような json が返ってきたら、アカウントがうまく作成されている。
{"status":"success",
 "data":{
   "id":1,
   "provider":"email",
   "uid":"alice@example.com",
   "allow_password_change":false,
   "name":null,
   "nickname":null,
   "image":null,
   "email":"alice@example.com",
   "created_at":"2022-06-11T04:08:27.059Z",
   "updated_at":"2022-06-11T04:08:27.143Z"
 }
}
データベースを見にいく。rails コマンドから mysql のコンソールにログインして。
bin/rails db
users テーブルの情報を取得。作成されているのが確認できる。
select * from users\G


                    id: 1
              provider: email
                   uid: alice@example.com
    encrypted_password: $2a$12$WzF9aa1iHilB54IMp7Swte5GwOrBffLXS2/l837fgS67w.HAtyey2
  reset_password_token: NULL
reset_password_sent_at: NULL
 allow_password_change: 0
   remember_created_at: NULL
    confirmation_token: NULL
          confirmed_at: NULL
  confirmation_sent_at: NULL
     unconfirmed_email: NULL
                  name: NULL
              nickname: NULL
                 image: NULL
                 email: alice@example.com
                tokens: {"M_Y5vUIxa20AhhKJTCcrKw":{"token":"$2a$10$EXgow5qnBSoizWjGEbVG9uf9uykv8n/ByJBHaJtbuKfOHHCsh915q","expiry":1656130107}}
            created_at: 2022-06-11 04:08:27.059770
            updated_at: 2022-06-11 04:08:27.143070
git add .
git commit -m "Create a registrations controller"
メールの確認
次に、メールの確認昨日の実装を行う。
confirmable を設定すると、ユーザが新たにアカウント登録した時に、登録したメールアドレスにメールが送信され、そのメール内の「アカウント確認」を押すまで本登録が完了しない様にできる。
devise の機能宣言の部分に:confirmableを追加する。
devise_auth_token は:confirmableを有効にした時、confirm_success_urlをフロントから受け取らなくてはならなくなる。
作成したapp/controllers/auth/reigstraitons_controller.rbのsign_up_paramsで値を許可して無いのでUnpermitted parameter: :confirm_success_urlの警告が出る。
仮に、confirm_success_urlを許可すると User model にはそのフィールドが無いのでエラーが出る。
放置しても良いのだが、それも気になるので、atter_accessorでとりあえずconfirm_success_urlを受け入れる。
  devise :database_authenticatable, :registerable,
         :recoverable, :rememberable, :validatable, :confirmable

  attr_accessor :confirm_success_url
app/controllers/auth/reigstraitons_controller.rbを開いて、confirm_success_urlを許可する。
  def sign_up_params
    params.permit(:email, :password, :password_confirmation , :confirm_success_url)
  end
devise から送るメールの設定を行う。これは前回の「メールの送信」モジュールで用意した ses のアドレスを利用する。
config/initializers/devise.rbを開いて、config.mailer_senderに SES のメールアドレスを指定する。
# with default "from" parameter.
config.mailer_sender = 'no-reply@sandbox.example.com'
開発環境下でリンクを設置した場合デフォルトのホスト名とポートを指定する。 開発環境下なので、rails サーバーの API ポート番号を指定する。
config.action_mailer.default_url_options = { host: 'localhost', port: 3001 }
準備ができたので、curl か REST Client から送ってみる。
curl -X POST http://localhost:3001/auth -d '[email]=alice@example.com&[password]=123456&[password_confirmation]=123456&[confirm_success_url]=http://localhost:3000'
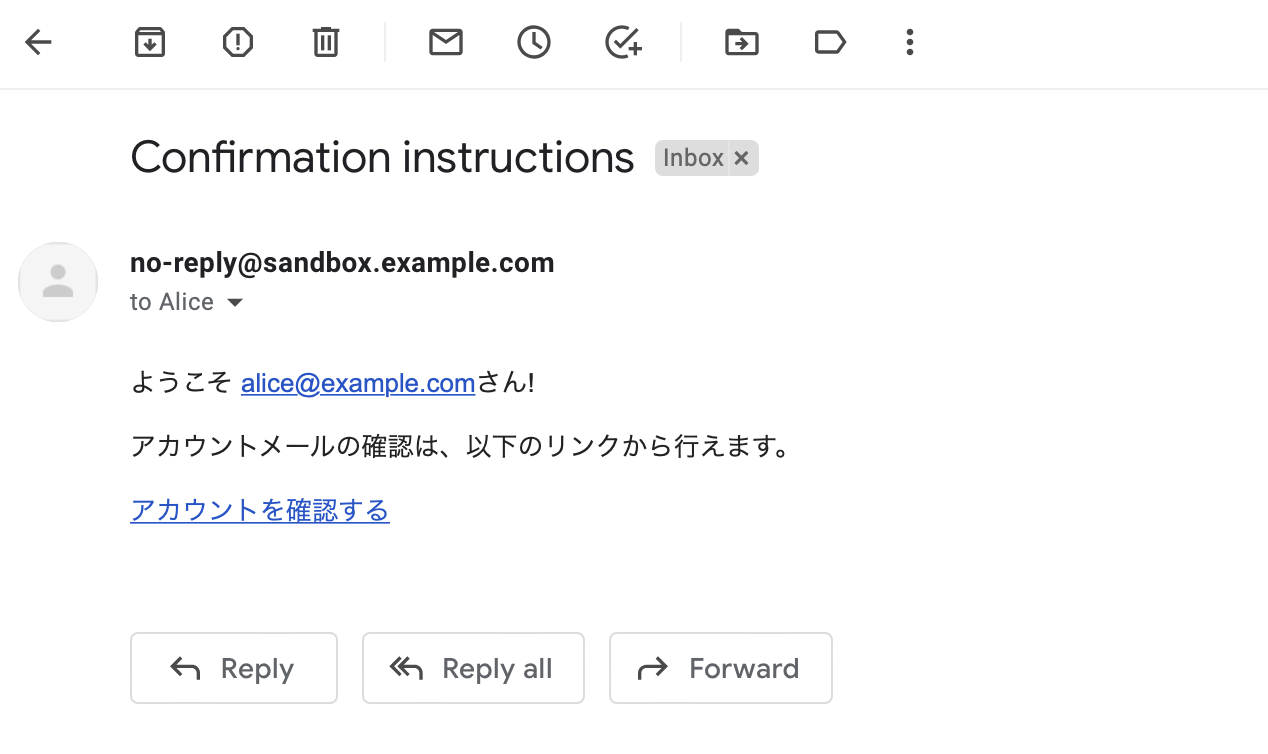
この様なあらかじめ用意されたメールがログに表示される。
From: no-reply@sandbox.example.com
Reply-To: no-reply@sandbox.example.com
To: alice+hoge@example.com
Message-ID: <aa@bb>
Subject: Confirmation instructions
Mime-Version: 1.0
Content-Type: text/html;
 charset=UTF-8
Content-Transfer-Encoding: 7bit
client-config: default
redirect-url: http://localhost:3000

<p>Welcome alice+hoge@example.com!</p>

<p>You can confirm your account email through the link below: </p>

<p><a href="http://localhost:3000/auth/confirmation?config=default&confirmation_token=eHQnFjK9GBgAb1pX3Svr&redirect_url=http%3A%2F%2Flocalhost%3A3000">Confirm my account</a></p>
細かい設定は今後やっていくとして、ひとまずメールの送信はできた。
git add .
git commit -m "Send confirmation email from devise"
メールの編集
上のメール本文を見ても分かる通り、devise は gem であらかじめ宣言された形式のフォーマットが確認メールとして送られる。
文章が英語だったり、スタイルが当たってなかったりと、変更の余地がある箇所が多々ある。 このメールフォーマットを自身の rails プロジェクトに展開し、編集可能なようにしておく。
普通にジェネレートすると devise の他の login とか sign_up などの MVC 用の view も展開されてしまうので、mailer だけを指定する。
bin/rails g devise:views users -v mailer
これらのファイルが作れれる。
- app/views/users/mailer/confirmation_instructions.html.erb
- app/views/users/mailer/email_changed.html.erb
- app/views/users/mailer/password_change.html.erb
- app/views/users/mailer/reset_password_instructions.html.erb
- app/views/users/mailer/unlock_instructions.html.erb
- app/views/users/shared/_error_messages.html.erb
- app/views/users/shared/_links.html.erb
次に、scope の変更を行う。devise が利用する mail フォーマットの参照先を rails に展開した方にする。
scoped_viewsをtrueにする。
# ==> Scopes configuration
# Turn scoped views on. Before rendering "sessions/new", it will first check for
# "users/sessions/new". It's turned off by default because it's slower if you
# are using only default views.
config.scoped_views = true
展開したメールの言語を日本語に変更して送信する。
もう1つ redirect_url のパラメーターを追加す流。 このテンプレートは devise が作成したもので、devise_auth_token が管理しているものではない。 そのため、redirect_url がリンクに付与されないので、自分で付与してあげる。
<p>ようこそ <%= @email %>さん!</p>

<p>アカウントメールの確認は、以下のリンクから行えます。</p>

<p><%= link_to 'アカウントを確認する', confirmation_url(@resource, confirmation_token: @token, redirect_url: message['redirect-url']) %></p>
rails サーバーを再起動する。
devise は一度データベースに登録されたアドレスと同じメールアドレスで別のアカウントは作れないので、 もしも、前回と同じメールアドレスでアカウントを作りたい場合は、1度データベースをリセットする。
bin/rails db:migrate:reset
その上で前の章同様にアカウントの登録を試す。
curl -X POST http://localhost:3001/auth -d '[email]=alice@example.com&[password]=123456&[password_confirmation]=123456&[confirm_success_url]=http://localhost:3000'
この様なメールが届く
git add .
git commit -m "Expand devise mail and create ja email"
新規登録画面の作成とマークアップ
裏の API 側の実装は完了したので、今度は表のフロント側の実装を行っていく。
新規アカウント登録画面ではメールアドレス、パスワード、確認パスワードの入力をさせ、 フォーム送信後はメールが送られたことを表示する。
react プロジェクトに移動して、pagesフォルダに sign_up ページを作成する。
touch pages/sign_up.jsx
最初にアクションやプログラムは除いたガワだけ実装してしまう。
なお、下のコードは見やすいように、prettier のフォーマットをオフにして横に長い。
import Head from 'next/head'
import { Text, Box, TextField, Clickable } from '../atomic/'

export default function SignUp() {
  return (
    <div>
      <Head>
        <title>SignUp</title>
        <meta name="description" content="Sign up" />
        <link rel="icon" href="/favicon.ico" />
      </Head>

      <Box as="main" mt={[60, null, 80]}>
        <Text
          as="h1"
          textAlign="center"
          fontSize={[26, null, 36]}
          fontWeight={700}
          lineHeight={['26px', null, '36px']}
          letterSpacing={[1.3, null, 1.8]}
          color="#333"
        >
          新規登録
        </Text>

        <Box mt={[40, null, 60]} px={[16, null, 0]} width={['100%', 420]} mx="auto">
          <Text fontSize={14} lineHeight="1.71" letterSpacing={0.7} color="dimgray">
            メールアドレス
          </Text>
          <TextField
            name="email"
            height={46}
            width="100%"
            borderColor="gray"
            borderWidth={1}
            borderRadius={3}
            py={10}
            pl={14}
            fontColor="black"
            fontSize={16}
            letterSpacing={0.8}
            mt={8}
          />
          <Text fontSize={14} lineHeight="1.71" letterSpacing={0.7} color="dimgray" mt={30}>
            パスワード
          </Text>
          <TextField
            type="password"
            name="password"
            height={46}
            width="100%"
            borderColor="gray"
            borderWidth={1}
            borderRadius={3}
            py={10}
            pl={14}
            fontColor="black"
            fontSize={16}
            letterSpacing={0.8}
            mt={8}
          />
          <Text fontSize={14} lineHeight="1.71" letterSpacing={0.7} color="dimgray" mt={30}>
            パスワードの再確認
          </Text>
          <TextField
            type="password"
            name="password_confirmation"
            height={46}
            width="100%"
            borderColor="gray"
            borderWidth={1}
            borderRadius={3}
            py={10}
            pl={14}
            fontColor="black"
            fontSize={16}
            letterSpacing={0.8}
            mt={8}
          />
          <Clickable
            width={[220, null, 280]}
            height={[44, null, 50]}
            borderRadius={[44 / 2, null, 50 / 2]}
            bg="dimgray"
            color="white"
            hoverShadow="silver"
            borderColor="gray"
            borderWidth={1}
            display="flex"
            alignItems="center"
            justifyContent="center"
            overflow="hidden"
            mt={80}
            mx="auto"
          >
            登録する
          </Clickable>
        </Box>
      </Box>
    </div>
  )
}
一度ここでコミットしておく。
git add .
git commit -m "Create a sign up page and markup"
API クライアント
ここから API のクライアントを作成する。API を作っているときに試したように curl でも REST Client でも良いので、api の url に対して情報を投げてきた。 同じように Next.js からも API を叩く必要がある。こういった API を叩くためのクライアントを作成する。
API を叩くためのライブラリは axios を利用する。また、ruby は慣習的にスネークケース(user_name)を変数名で使い react はキャメルケース(userName)を使っている。
これの切り替えを都度都度行うのは面倒なので、axios のコンバーターを利用する。
yarn add axios axios-case-converter
新しい lib ファイルを作成する。
client.jsは API クライアントのコアで API を叩く各モデルファイルで利用する共通の設定を記述する。
今回はUserモデル周りの API を叩くのでuser.jsを作成する。
mkdir lib/api
touch lib/api/client.js
touch lib/api/user.js
client には API を叩くための共通の設定を記述する。
API_ROOTは本番環境で環境変数がセットされていればそれを使い、ローカルなどの場合はlocalhostを利用する。
applyCaseMiddlewareは axios で受け取ったレスポンスの値をスネークケースからキャメルケースに変換する。
または送信するリクエストの値をキャメルケースからスネークケースに変換してくれるライブラリ。
process.env.NEXT_PUBLIC_API_ROOTは本番環境でAPIのエンドポイントが決まった場合、この環境変数を利用する。
Next.jsはブラウザで参照できる公開用の環境変数はNEXT_PUBLIC_プレフィックスをつける。
import applyCaseMiddleware from 'axios-case-converter'
import axios from 'axios'

const API_ROOT = process.env.NEXT_PUBLIC_API_ROOT || 'http://localhost:3001'

// ヘッダーに関してはケバブケースのままで良いので適用を無視するオプションを追加
const options = {
  ignoreHeaders: true,
}

const client = applyCaseMiddleware(
  axios.create({
    baseURL: API_ROOT,
  }),
  options,
)

export default client
新規ユーザーのアカウント作成のエンドポイントを叩く関数を作成する。
import client from './client'

// サインアップ(新規アカウント作成)
export const signUp = (params) => {
  return client.post('auth', null, {
    params,
  })
}
API を叩く準備が完了したのでここでコミット
git add .
git commit -m "Create a singUp fuction"
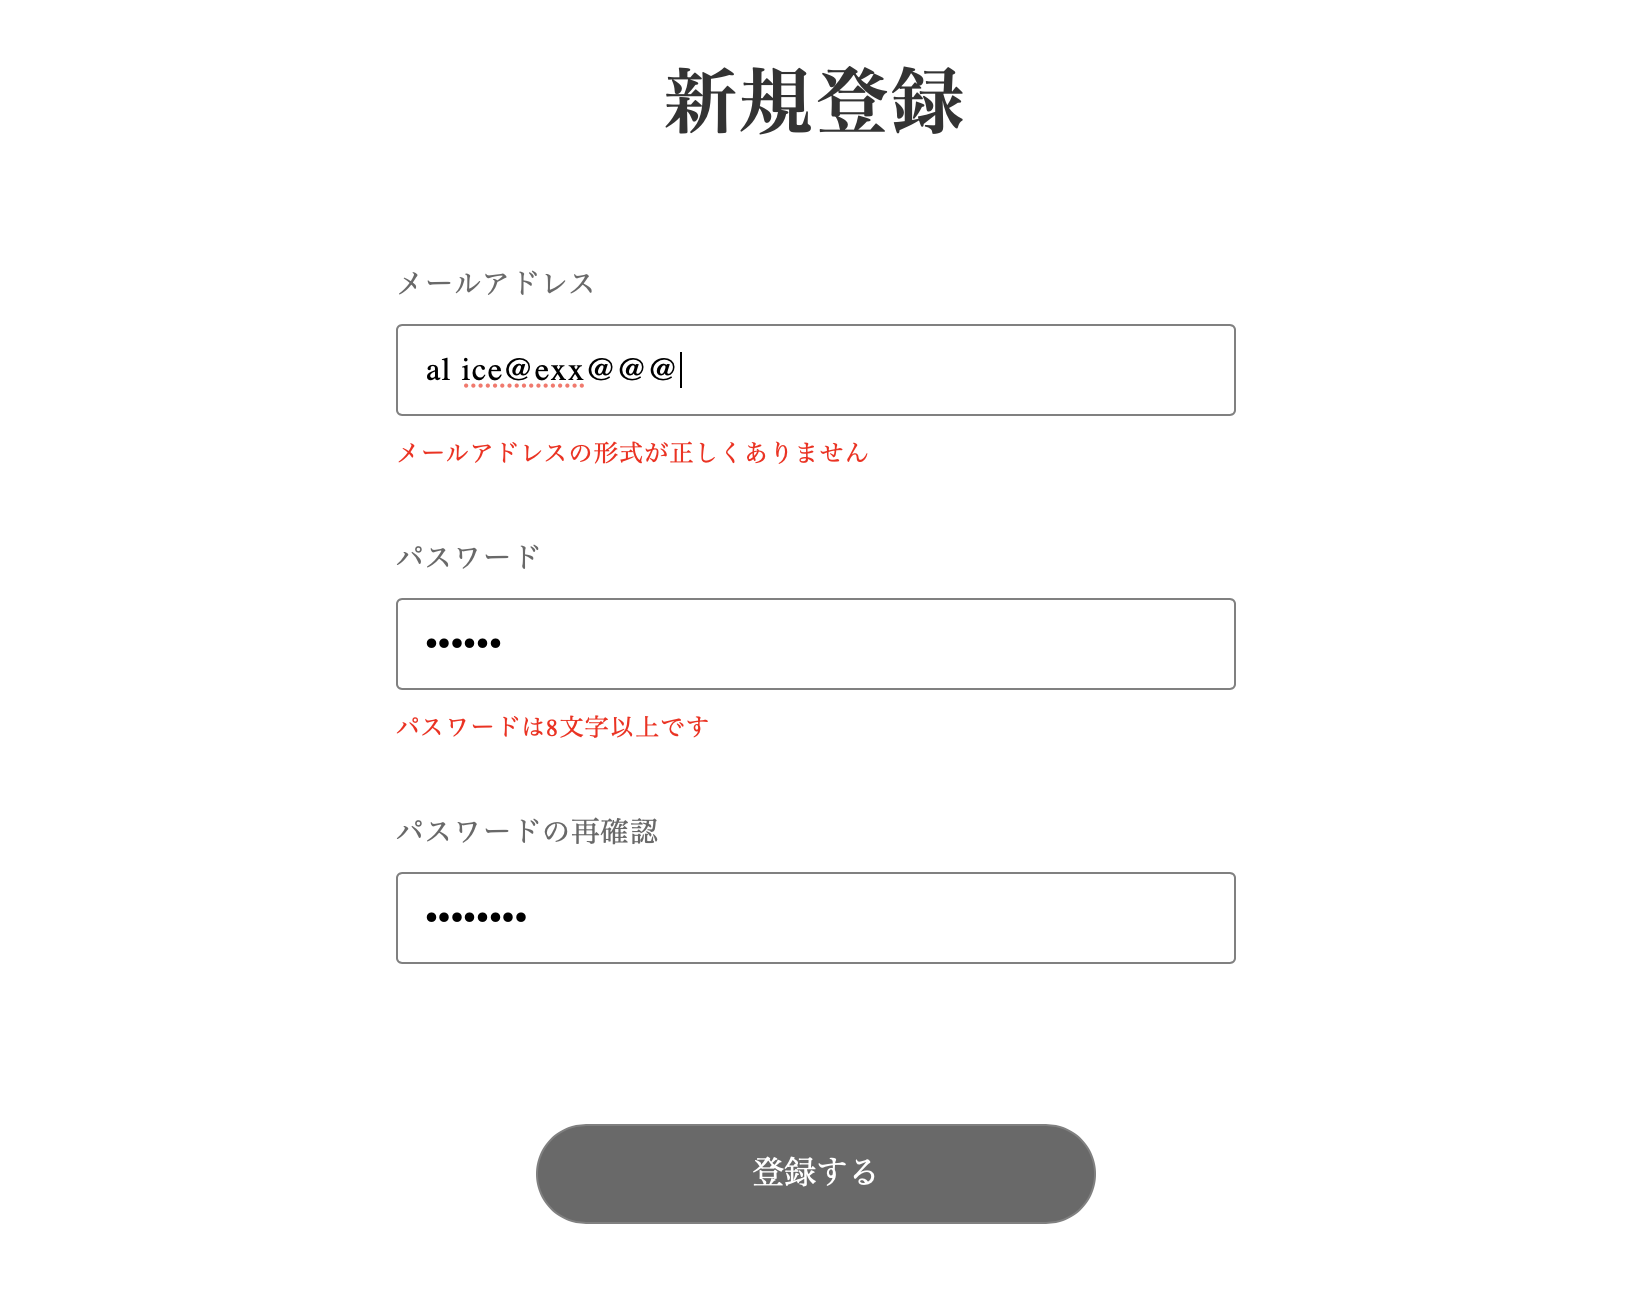
フォームのバリデーション
次にフォームのバリデーションを行う。 フォームのバリデーションとは、入力されたデータをサーバに送る前にある程度、フォーマットに則っているかを判定し、 もしも準じない場合は警告を出す機能である。 例えば、メールアドレスを入力した際に間違って空白が入ってしまった場合はそれをサーバに送らずにメッセージを表示する。
フォームのバリデーションはreact-hook-formというライブラリがよく使われているので、そちらを利用する。
yarn add react-hook-form
まずは、userform をインポートする。
import { useForm } from 'react-hook-form'
SignUp()関数の useState あたりに以下を書き込む。
const {
  register,
  handleSubmit,
  watch,
  formState: { errors },
} = useForm()
フォームを送信する関数onSubmitを作成する。
実際に API は叩かないが、必要な値は全て用意しておく。
また、async 関数なのは API を叩く時に await を利用するからである。
confirmSuccessUrlは将来的にpages/confirmaiton.jsx に飛ばすので今からその URL を指定する。
本番環境の場合は環境変数を読み込みそちらに飛ばすようにする。
const onSubmit = async (data) => {
  console.log(data)
  const params = {
    email: data.email,
    password: data.password,
    passwordConfirmation: data.passwordConfirmation,
    confirmSuccessUrl: process.env.NEXT_PUBLIC_CONFIRMATION_URL || 'http://localhost:3000/confirmation',
  }
  console.log(params)
}
jsx のemailのテキストフィールド DOM に react hook form のバリデーションを加える。
正規表現でメールアドレスのパターンを記述してある。
emailDOM の直下にエラーメッセージを表示するロジックを加える。
<TextField
  name="email"
  ...
  {...register('email', {
    required: true,
    pattern: {
      value: /^[A-Z0-9._%+-]+@[A-Z0-9.-]+\.[A-Z]{2,}$/i,
     },
  })}
  ...
/>
{'email' in errors && (
  <Text fontSize={12} lineHeight="22px" letterSpacing={0.6} color="red" mt={8}>
    {errors.email?.type === 'required' && 'メールアドレスは必須です'}
    {errors.email?.type === 'pattern' && 'メールアドレスの形式が正しくありません'}
  </Text>
)}
同じ様にpasswordのテキストフィールド DOM に react hook form のバリデーションを加える。
こちらでチェックしているのは存在と長さである。
passwordDOM の直下にエラーメッセージを表示するロジックを加える。
<TextField
  name="password"
  ...
  {...register('password', {
    required: true,
    minLength: 8,
  })}
  ...
/>
{'password' in errors && (
  <Text fontSize={12} lineHeight="22px" letterSpacing={0.6} color="red" mt={8}>
    {errors.password?.type === 'required' && 'パスワードは必須です'}
    {errors.password?.type === 'minLength' && 'パスワードは8文字以上です'}
  </Text>
)}
同じ様にpasswordConfirmationのテキストフィールド DOM に react hook form のバリデーションを加える。
ここではvalidate: (value) => value === watch('password'),という特殊な処理をしている。
watchはreact-hook-formが提供する関数で、`passwordの値を取得できる。
パスワードと確認用のパスワードの値が同じかチェックしている。
<TextField
  name="password_confirmation"
  ...
  {...register('passwordConfirmation', {
    required: true,
    minLength: 8,
    validate: (value) => value === watch('password'),
  })}
  ...
/>
{'passwordConfirmation' in errors && (
  <Text fontSize={12} lineHeight="22px" letterSpacing={0.6} color="red" mt={8}>
    {errors.passwordConfirmation?.type === 'required' && '確認パスワードは必須です'}
    {errors.passwordConfirmation?.type === 'minLength' && '確認パスワードは8文字以上です'}
    {errors.passwordConfirmation?.type === 'validate' && 'パスワードと確認パスワードが違います'}
  </Text>
)}
最後に「登録する」ボタンに onSubmit を加えて完成である。
<Clickable
  ...
  onClick={handleSubmit(onSubmit)}
>
  登録する
</Clickable>
ブラウザで挙動を試してみる。
git add .
git commit -m "Create a register form validation"
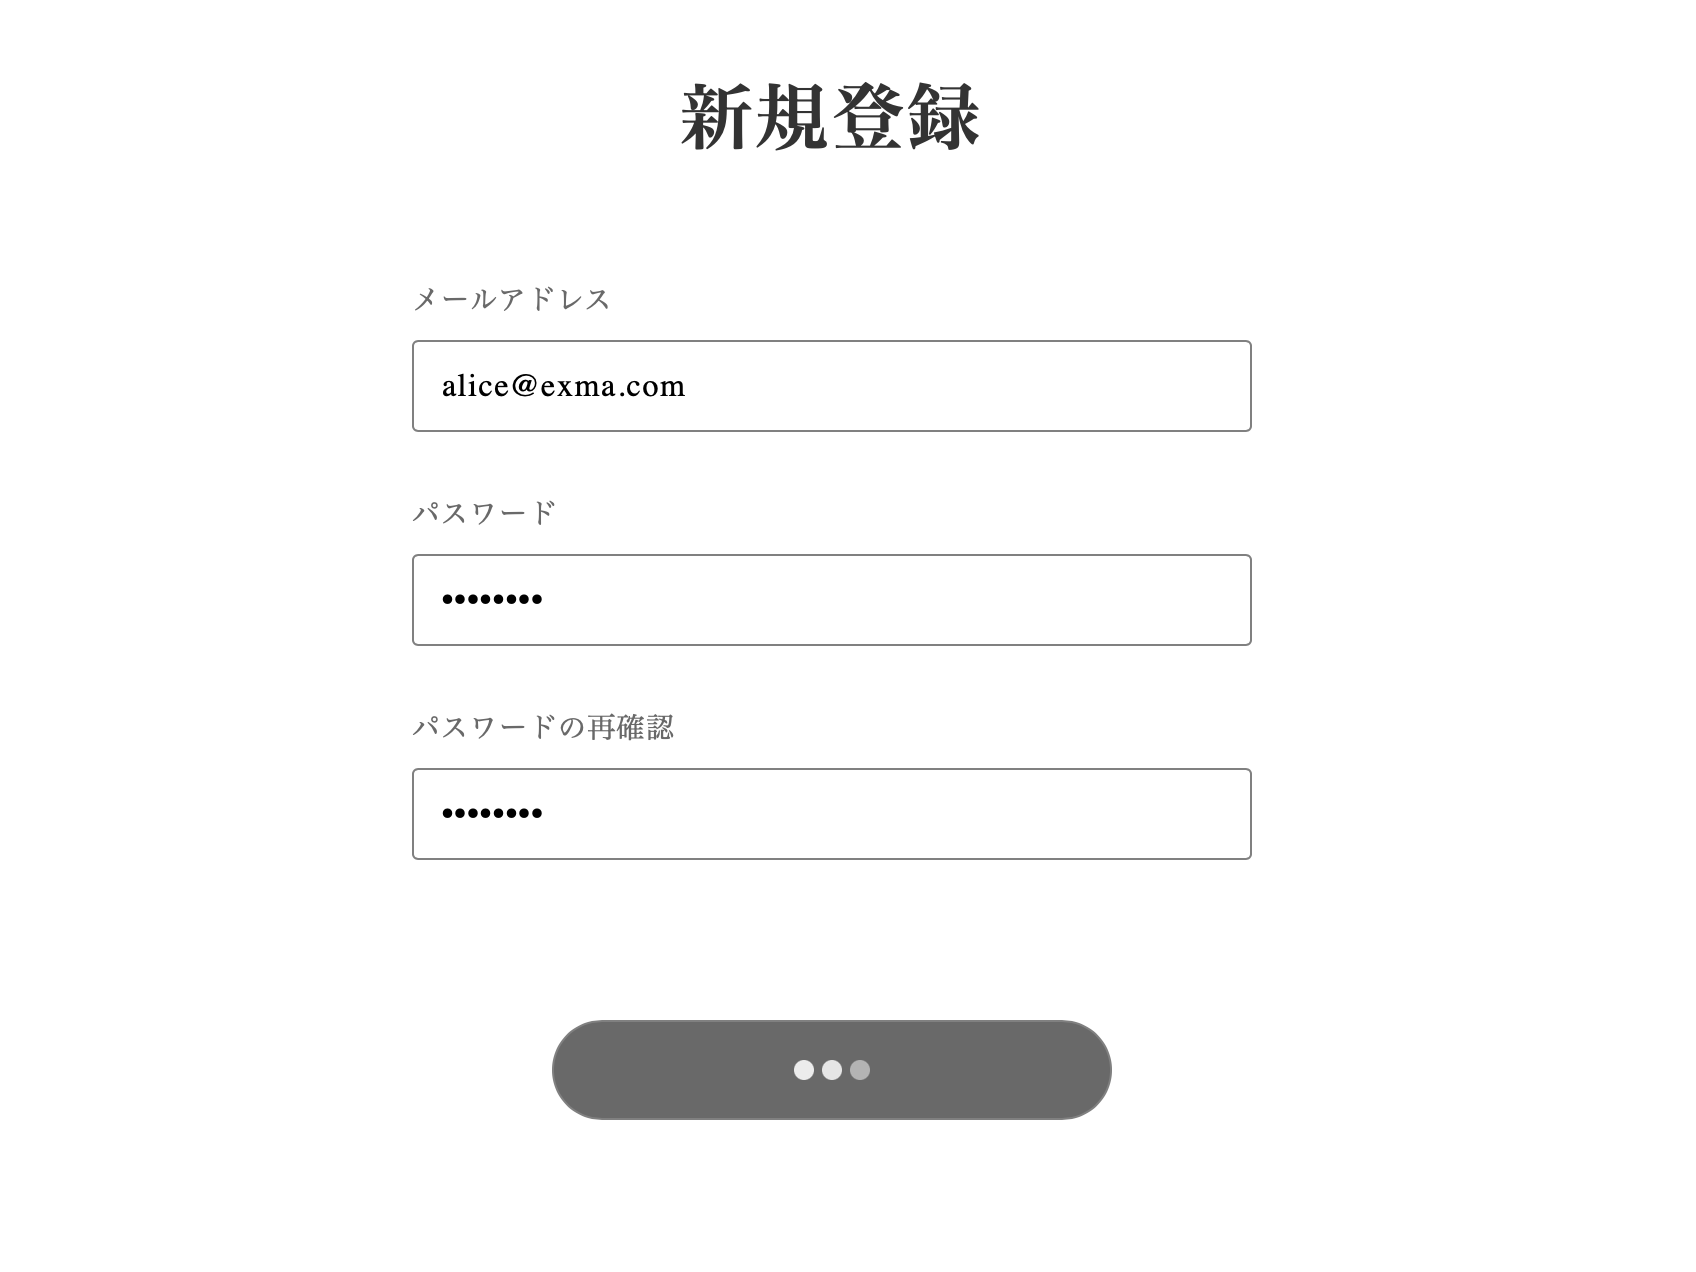
ローディングアニメーション
フロントとサーバとの間でやりとりを行う場合、何らかの待機時間が生まれる。 この時、何らかの表現を行わないとユーザーは何が起きているか分からない。 そこでアニメーションを利用して、ユーザーに待機中を受け入れてもらう。
最初にThreeDots コンポーネントをインポート。
それと、アニメショーン中であるというステートを持つ必要があるので、useState もインポートしておく。
import { useState } from 'react'
import { Text, Box, TextField, Clickable, ThreeDots } from '../atomic/'
次にSignUp() 関数の外にsleep関数を作成する。
これは特定の秒数処理を止めることができる。
ひとまず、これを利用して、擬似的に API のやりとり中を演出する。
const sleep = (msec) => new Promise((resolve) => setTimeout(resolve, msec))
SignUp()関数の中でまずは通信中かを判定するステートを作成する。
const [animation, setAnime] = useState(false)
onSubmit 関数を変更して擬似的な通信中の処理を加える。awit sleep のところがそれである。
const onSubmit = async (data) => {
  const params = {
    email: data.email,
    password: data.password,
    passwordConfirmation: data.passwordConfirmation,
    confirmSuccessUrl: process.env.NEXT_PUBLIC_CONFIRMATION_URL || 'http://localhost:3000/confirmation',
  }
  console.log(params)

  setAnime(true)
  await sleep(1500)
  setAnime(false)
}
最後に登録するボタンの DOM をanimationステートによって切り替わる様にする。
<Clickable
  ...省略...
  onClick={handleSubmit(onSubmit)}
  >
    {animation ? <ThreeDots bg="white" /> : <>登録する</>}
</Clickable>
フォームを入力し、登録するボタンを押せば処理される。
git add .
git commit -m "Create a registration loading animation"
メール確認画面の表示
フォームの入力が API に送られ、正常に処理された後は別の画面を表示する。
今までの実装では別のページに飛ばして、表示していたが、簡単なページなので、そのままsign_up.jsx に表示する。
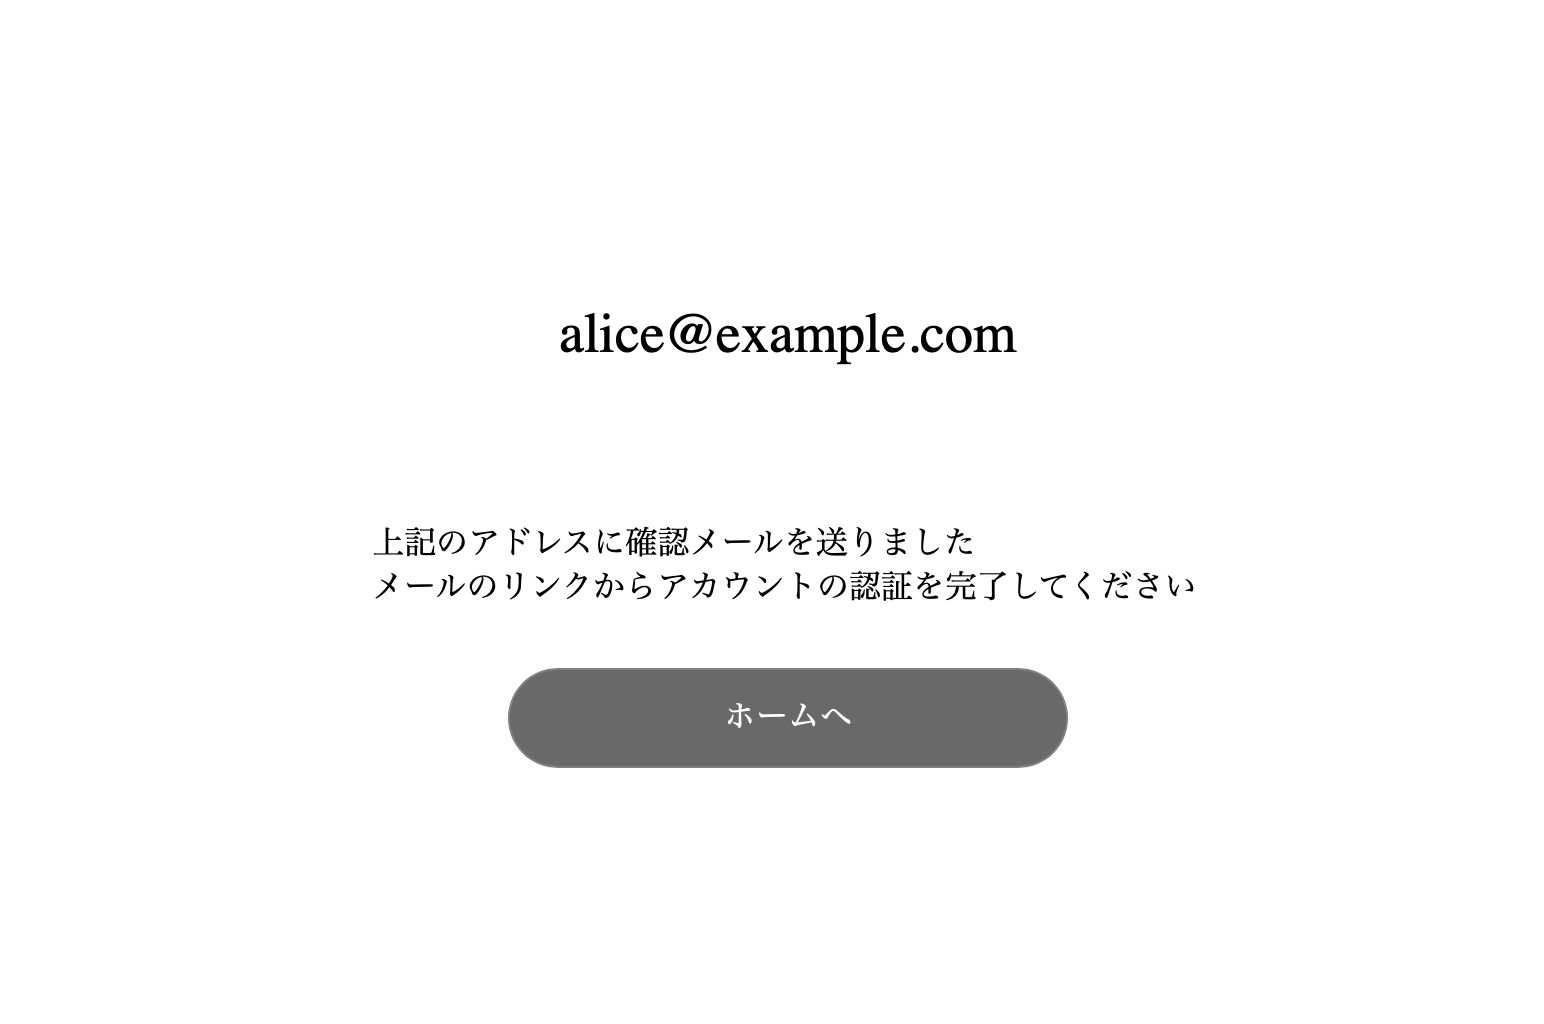
表示する画面では、メールが送られたこと、リンクをクリックしてアカウントを認証することを伝える。
確認画面からホームに戻るLinkをインポート。
import { Text, Box, TextField, Clickable, ThreeDots, Link } from '../atomic/'
animationステートの宣言の下にsuccessステートを宣言する。
const [success, setSuccess] = useState(false)
onSubmit関数のawait sleep(15000)の下に追加setSuccess(true)を追加。
setAnime(true)
await sleep(15000)
setSuccess(true)
setAnime(false)
SignUp()関数の外にSendEmailScreenを作成する。
const SendEmailScreen = ({ email }) => (
  <Box
    display="flex"
    alignItems="center"
    position="absolute"
    top={0}
    left={0}
    width="100%"
    height="100%"
    styles={{ zIndex: 1000 }}
    bg="white"
  >
    <Box mx="auto">
      <Text fontSize={[24, null, 28]} textAlign="center">
        {email}
      </Text>
      <Text fontSize={[12, null, 16]} lineHeight="1.2" mt={[40, null, 80]} mx="auto">
        上記のアドレスに確認メールを送りました
      </Text>
      <Text fontSize={[12, null, 16]} lineHeight="1.2" mt={3} mx="auto">
        メールのリンクからアカウントの認証を完了してください
      </Text>
      <Link
        href="/"
        width={[220, null, 280]}
        height={[44, null, 50]}
        borderRadius={[44 / 2, null, 50 / 2]}
        bg="dimgray"
        color="white"
        hoverShadow="silver"
        borderColor="gray"
        borderWidth={1}
        display="flex"
        alignItems="center"
        justifyContent="center"
        overflow="hidden"
        mt={30}
        mx="auto"
      >
        ホームへ
      </Link>
    </Box>
  </Box>
)
SignUp()関数の DOM で下の方のどこでも良いのでsuccessステートがtrue ならSendEmailScreenを表示するコードを加える。
watchでフォームに入力された email を渡してあげる。
export default function SignUp() {
  ...省略...
  return (
    <div>
      ...省略...
      {success && <SendEmailScreen email={watch('email')} />}
    </div>
  )
}
フォームを入力して、送信してみる。
git add .
git commit -m "Create a send email screen"
API と通信処理
準備が整ったので、クライアントから API に情報を送ってみる。
signUp関数をインポート
import { signUp } from '../lib/api/user'
onSubmitを書き換える。
const onSubmit = async (data) => {
  const params = {
    email: data.email,
    password: data.password,
    passwordConfirmation: data.passwordConfirmation,
    confirmSuccessUrl: 'http://localhost:3000/confirmation',
  }
  console.log(params)
  setAnime(true)
  try {
    const res = await signUp(params)
    //await sleep(1500)
    console.log(res)

    if (res.status === 200) {
      setSuccess(true)
      console.log('Signed in successfully!')
    } else {
      console.log('some thig went wrong')
    }
  } catch (err) {
    console.log(err)
  }
  setAnime(false)
}
メールが送られて来ればうまく処理されている。 上のコードで sleep をコメントアウトしている理由は、もしもサーバーの処理が早すぎてアニメーションの時間が短いなと判断したら、 1 秒くらい余分に待たせたりして UX を改善できるからである。
git add .
git commit -m "Send register information from client"
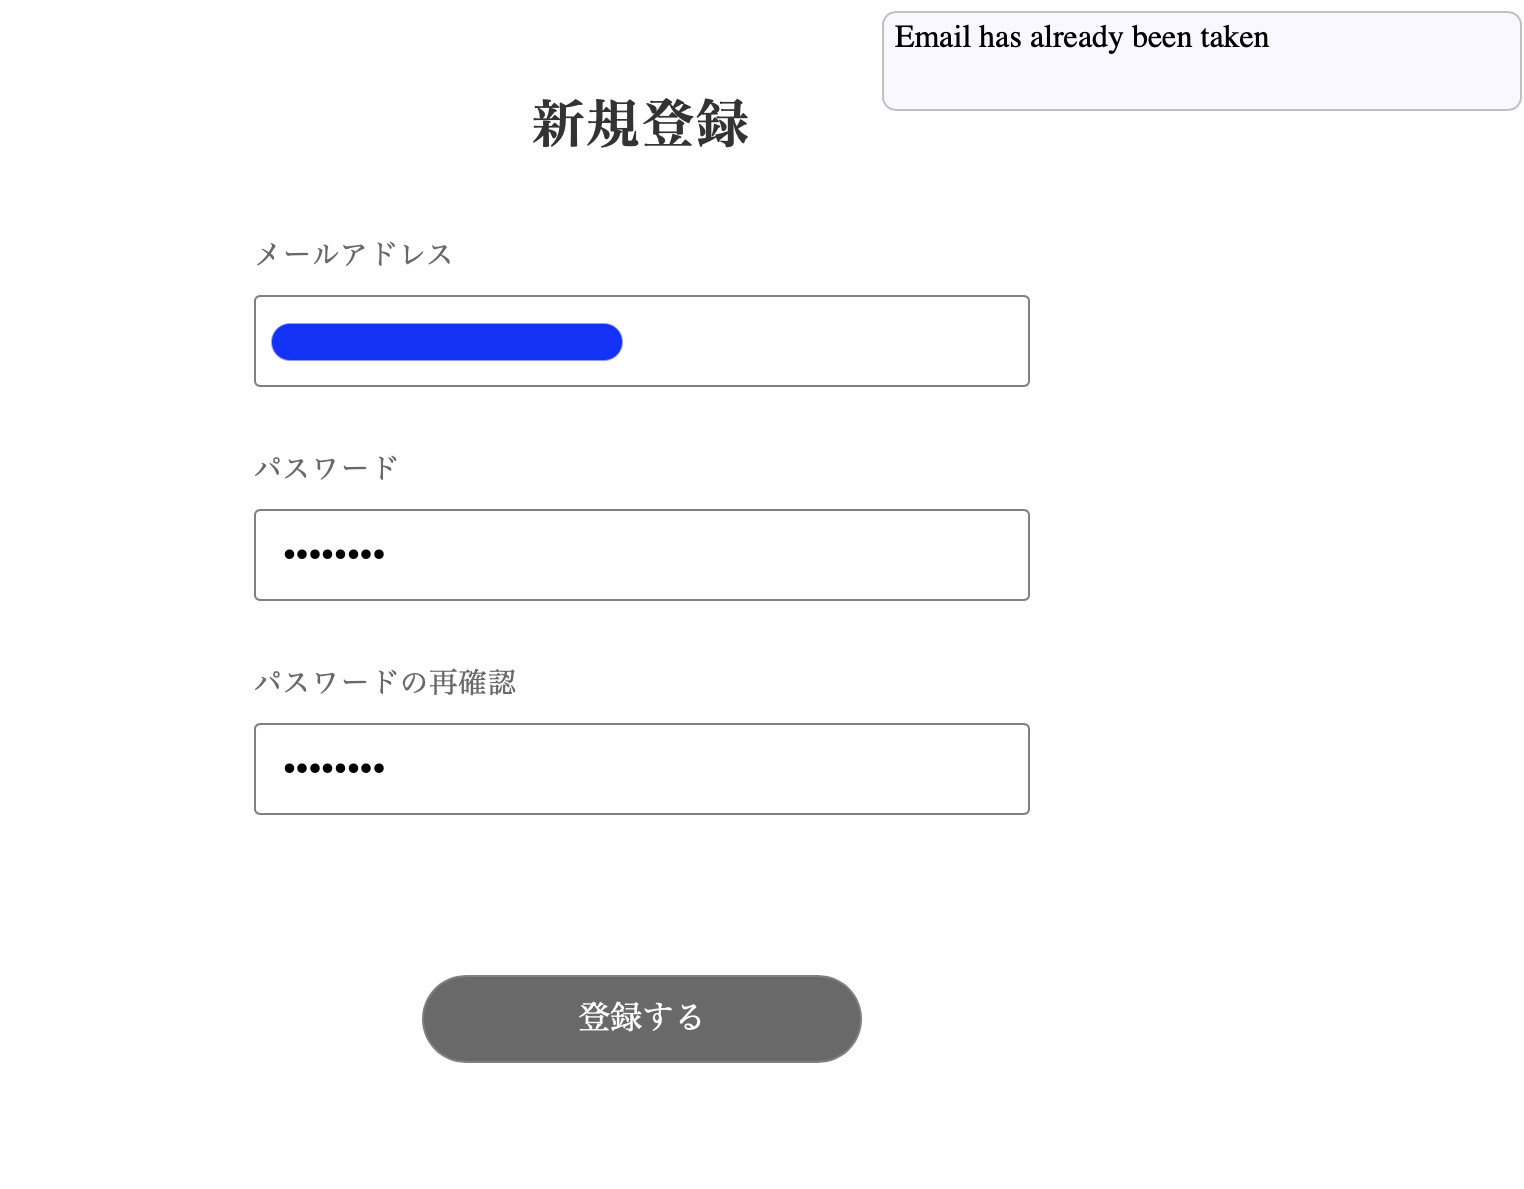
エラーハンドリング
サーバーに情報を送るところまでは完成したが、もしもサーバー側でエラーが生じた場合のユーザーに何らかの情報を渡す必要がある。 この章ではすでに登録されているメールアドレスをもう1度登録しようとした場合に生じるエラーをハンドリングしてみる。
sign_up.jsxで Alert をインポート
import { Text, Box, TextField, Clickable, ThreeDots, Link, Alert } from '../atomic/'
SignUp() の中で3つ関数とステートを宣言
const [notifications, setNotifications] = useState([])
const createNotification = (message) => setNotifications([...notifications, { id: Math.random(), message }])
const deleteNotification = (id) => setNotifications(notifications.filter((notification) => notification.id !== id))
notifications は自明な通り、通知を収める配列である。
createNotificationとdeleteNotificationは配列操作を行った上でsetNotificationsする関数である。
idを持たせているのは、通知を削除するときに、配列から任意の要素を削除できる様にするためである。
onSubmit関数を編集。
エラーが発生した時に、通知にメッセージを代入している。
const onSubmit = async (data) => {
  const params = {
    email: data.email,
    password: data.password,
    passwordConfirmation: data.passwordConfirmation,
    confirmSuccessUrl: process.env.NEXT_PUBLIC_CONFIRMATION_URL || 'http://localhost:3000/confirmation',
  }
  console.log(params)
  setAnime(true)
  try {
    const res = await signUp(params)
    //await sleep(1500)
    console.log(res)

    if (res.status === 200) {
      setSuccess(true)
      console.log('Signed in successfully!')
    } else {
      console.log('some thig went wrong')
      createNotification('予期せない問題が発生しました')
    }
  } catch (err) {
    console.log(err)
    createNotification(err.response.data.errors.fullMessages[0])
  }
  setAnime(false)
}
最後に、DOM に Alert を表示する。場所はどこでも良いがなるべく下の方に配置しておく。 Alert は children を受け取り表示するので、通知のスタイルはネスト下で定義してあげる。
<Box position="absolute" top="15px" right="20px">
  {notifications.map(({ id, message }) => (
    <Alert key={id} onDelete={deleteNotification} id={id}>
      <Box
        width={320}
        minHeight={50}
        borderRadius={7}
        border="1px solid silver"
        bg="ghostwhite"
        px={5.5}
        py={3}
        style={{ overflowWrap: 'break-word' }}
      >
        {message}
      </Box>
    </Alert>
  ))}
</Box>
git add .
git commit -m "Registration form error handling"
確認画面の処理
送られてきたメールに記載されたリンクを元にアカウントの確認を行う。
アカウント認証用に送られてきたメールアドレスをクリックするとこのようなリンクに飛ぶ。
http://localhost:3001/auth/confirmation?confirmation_token=VMyRLpFzYGz-ygpi5zoR&redirect_url=http%3A%2F%2Flocalhost%3A3000/confirmation
このリンクは API サーバーに直接飛んでいる。
API はこの GET リクエストが飛んできた時に、confirmation_token を見て、正しい値なら処理を完了させて&redirect_url=http://localhost:3000/confirmationに飛ばさせる。
なお、トークンが間違っていた場合、リダイレクトは行われず、ただ 404 がサーバーから返ってくる。そのため、UX は多少悪くなるが、基本的に認証系はうまくいくのでここはそのまま行く。
リダイレクト先をクライアントでキャッチできるようにするためにページを作成する。
touch pages/confirmation.jsx
import Head from 'next/head'
import { Box, Text, Link } from '../atomic/'

export default function Confirmation() {
  return (
    <div>
      <Head>
        <title>アカウントの認証</title>
        <meta name="description" content="メールアドレスからアカウントを有効化" />
        <link rel="icon" href="/favicon.ico" />
      </Head>

      <Box as="main" display="flex" alignItems="center" height="100vh">
        <Box mx="auto">
          <Text fontSize={[24, null, 28]} textAlign="center">
            アカウントが認証されました!
          </Text>
          <Text fontSize={[12, null, 16]} lineHeight="1.2" mt={[20, null, 40]} mx="auto" textAlign="center">
            リンクからログインするかホームに戻れます
          </Text>
          <Link
            href="/sign_in"
            width={[220, null, 280]}
            height={[44, null, 50]}
            borderRadius={[44 / 2, null, 50 / 2]}
            bg="dimgray"
            color="white"
            hoverShadow="silver"
            borderColor="gray"
            borderWidth={1}
            display="flex"
            alignItems="center"
            justifyContent="center"
            overflow="hidden"
            mt={80}
            mx="auto"
          >
            ログインする
          </Link>
          <Link
            href="/"
            width={[220, null, 280]}
            height={[44, null, 50]}
            borderRadius={[44 / 2, null, 50 / 2]}
            color="gray"
            hoverShadow="silver"
            borderColor="gray"
            borderWidth={1}
            display="flex"
            alignItems="center"
            justifyContent="center"
            overflow="hidden"
            mt={30}
            mx="auto"
          >
            ホームへ
          </Link>
        </Box>
      </Box>
    </div>
  )
}
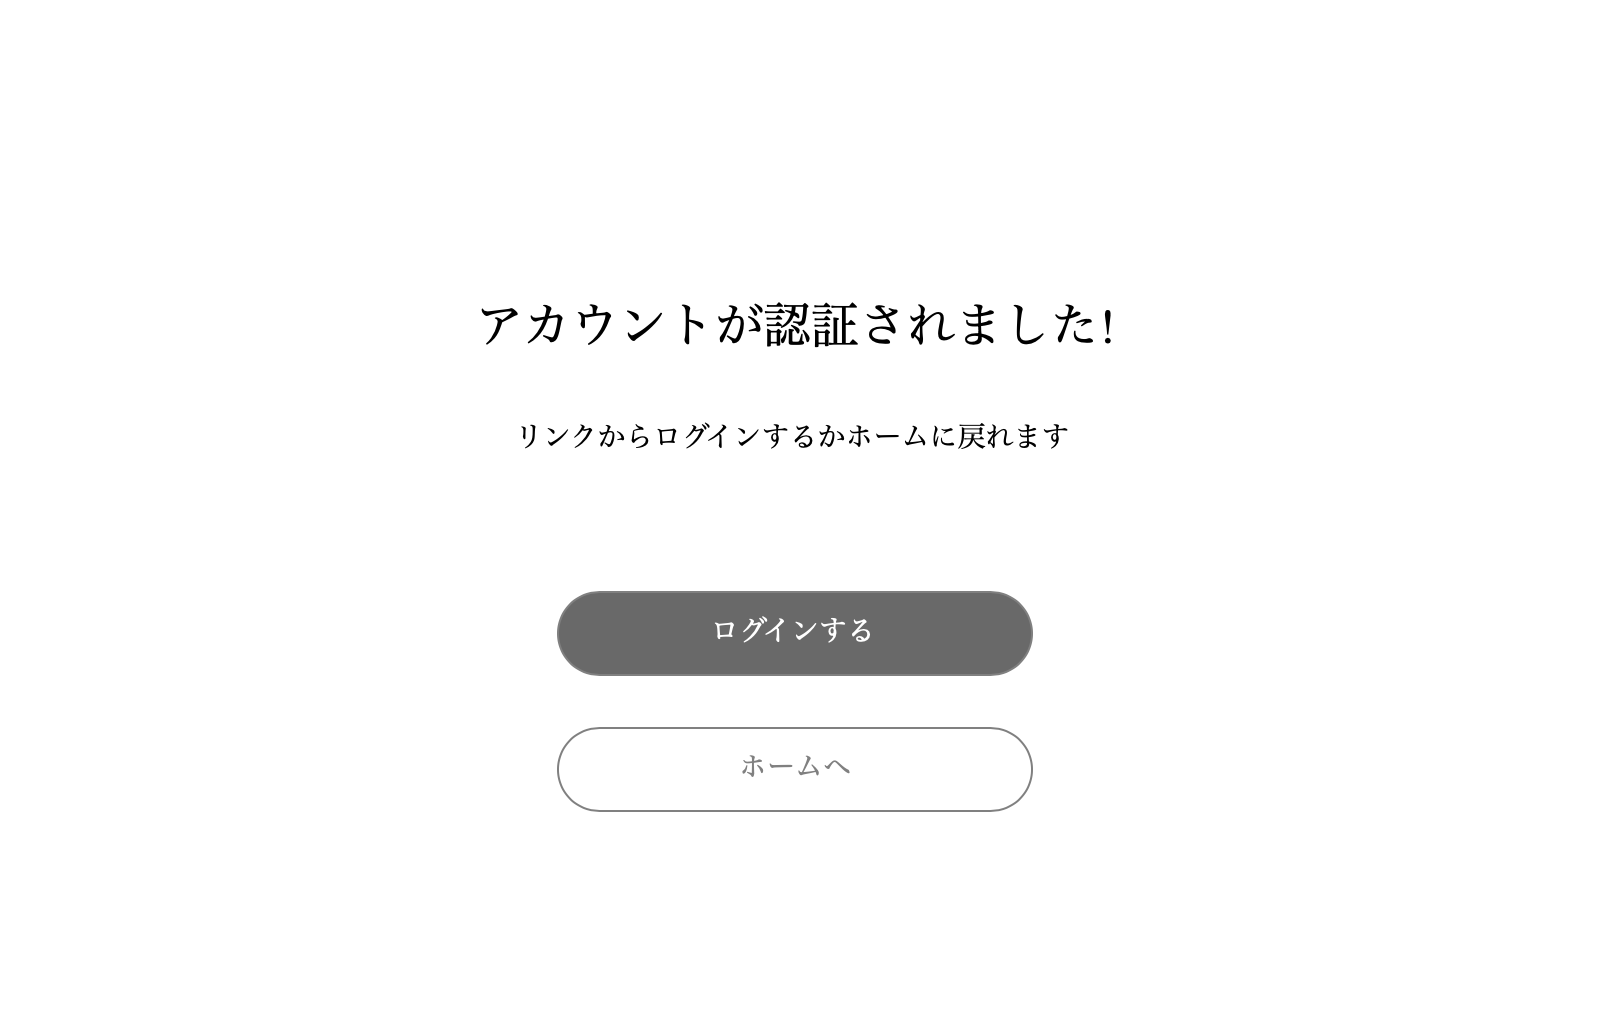
ログインはまだ作成していないが、あらかじめリンクを置いておく。
git add .
git commit -m "Create a confirmation page"
まとめ
ここまでが新規アカウント作成モジュールの実装内容である。
これが完成したpages/sign_up.jsxの全コードである。
import { useState } from 'react'
import { useForm } from 'react-hook-form'
import Head from 'next/head'
import { Text, Box, TextField, Clickable, ThreeDots, Link, Alert } from '../atomic/'
import { signUp } from '../lib/api/user'

const sleep = (msec) => new Promise((resolve) => setTimeout(resolve, msec))

export default function SignUp() {
  const [animation, setAnime] = useState(false)
  const [success, setSuccess] = useState(false)

  const [notifications, setNotifications] = useState([])
  const createNotification = (message) => setNotifications([...notifications, { id: Math.random(), message }])
  const deleteNotification = (id) => setNotifications(notifications.filter((notification) => notification.id !== id))

  const {
    register,
    handleSubmit,
    watch,
    formState: { errors },
  } = useForm()

  const onSubmit = async (data) => {
    const params = {
      email: data.email,
      password: data.password,
      passwordConfirmation: data.passwordConfirmation,
      confirmSuccessUrl: process.env.NEXT_PUBLIC_CONFIRMATION_URL || 'http://localhost:3000/confirmation',
    }
    console.log(params)
    setAnime(true)
    try {
      const res = await signUp(params)
      //await sleep(1500)
      console.log(res)

      if (res.status === 200) {
        setSuccess(true)
        console.log('Signed in successfully!')
      } else {
        console.log('some thig went wrong')
        createNotification('予期せない問題が発生しました')
      }
    } catch (err) {
      console.log(err)
      createNotification(err.response.data.errors.fullMessages[0])
    }
    setAnime(false)
  }

  return (
    <div>
      <Head>
        <title>SignUp</title>
        <meta name="description" content="Sign up" />
        <link rel="icon" href="/favicon.ico" />
      </Head>

      <Box as="main" mt={[60, null, 80]}>
        <Text
          as="h1"
          textAlign="center"
          fontSize={[26, null, 36]}
          fontWeight={700}
          lineHeight={['26px', null, '36px']}
          letterSpacing={[1.3, null, 1.8]}
          color="#333"
        >
          新規登録
        </Text>

        <Box mt={[40, null, 60]} px={[16, null, 0]} width={['100%', 420]} mx="auto">
          <Text fontSize={14} lineHeight="1.71" letterSpacing={0.7} color="dimgray">
            メールアドレス
          </Text>
          <TextField
            name="email"
            {...register('email', {
              required: true,
              pattern: {
                value: /^[A-Z0-9._%+-]+@[A-Z0-9.-]+\.[A-Z]{2,}$/i,
              },
            })}
            height={46}
            width="100%"
            borderColor="gray"
            borderWidth={1}
            borderRadius={3}
            py={10}
            pl={14}
            fontColor="black"
            fontSize={16}
            letterSpacing={0.8}
            mt={8}
          />
          {'email' in errors && (
            <Text fontSize={12} lineHeight="22px" letterSpacing={0.6} color="red" mt={8}>
              {errors.email?.type === 'required' && 'メールアドレスは必須です'}
              {errors.email?.type === 'pattern' && 'メールアドレスの形式が正しくありません'}
            </Text>
          )}

          <Text fontSize={14} lineHeight="1.71" letterSpacing={0.7} color="dimgray" mt={30}>
            パスワード
          </Text>

          <TextField
            type="password"
            name="password"
            {...register('password', {
              required: true,
              minLength: 8,
            })}
            height={46}
            width="100%"
            borderColor="gray"
            borderWidth={1}
            borderRadius={3}
            py={10}
            pl={14}
            fontColor="black"
            fontSize={16}
            letterSpacing={0.8}
            mt={8}
          />
          {'password' in errors && (
            <Text fontSize={12} lineHeight="22px" letterSpacing={0.6} color="red" mt={8}>
              {errors.password?.type === 'required' && 'パスワードは必須です'}
              {errors.password?.type === 'minLength' && 'パスワードは8文字以上です'}
            </Text>
          )}

          <Text fontSize={14} lineHeight="1.71" letterSpacing={0.7} color="dimgray" mt={30}>
            パスワードの再確認
          </Text>
          <TextField
            type="password"
            name="password_confirmation"
            {...register('passwordConfirmation', {
              required: true,
              minLength: 8,
              validate: (value) => value === watch('password'),
            })}
            height={46}
            width="100%"
            borderColor="gray"
            borderWidth={1}
            borderRadius={3}
            py={10}
            pl={14}
            fontColor="black"
            fontSize={16}
            letterSpacing={0.8}
            mt={8}
          />
          {'passwordConfirmation' in errors && (
            <Text fontSize={12} lineHeight="22px" letterSpacing={0.6} color="red" mt={8}>
              {errors.passwordConfirmation?.type === 'required' && '確認パスワードは必須です'}
              {errors.passwordConfirmation?.type === 'minLength' && '確認パスワードは8文字以上です'}
              {errors.passwordConfirmation?.type === 'validate' && 'パスワードと確認パスワードが違います'}
            </Text>
          )}

          <Clickable
            width={[220, null, 280]}
            height={[44, null, 50]}
            borderRadius={[44 / 2, null, 50 / 2]}
            bg="dimgray"
            color="white"
            hoverShadow="silver"
            borderColor="gray"
            borderWidth={1}
            display="flex"
            alignItems="center"
            justifyContent="center"
            overflow="hidden"
            mt={80}
            mx="auto"
            onClick={handleSubmit(onSubmit)}
          >
            {animation ? <ThreeDots bg="white" /> : <>登録する</>}
          </Clickable>
        </Box>
      </Box>
      <Box position="absolute" top="15px" right="20px">
        {notifications.map(({ id, message }) => (
          <Alert key={id} onDelete={deleteNotification} id={id}>
            <Box
              width={320}
              minHeight={50}
              borderRadius={7}
              border="1px solid silver"
              bg="ghostwhite"
              px={5.5}
              py={3}
              style={{ overflowWrap: 'break-word' }}
            >
              {message}
            </Box>
          </Alert>
        ))}
      </Box>
      {success && <SendEmailScreen email={watch('email')} />}
    </div>
  )
}

const SendEmailScreen = ({ email }) => (
  <Box
    display="flex"
    alignItems="center"
    position="absolute"
    top={0}
    left={0}
    width="100%"
    height="100%"
    styles={{ zIndex: 1000 }}
    bg="white"
  >
    <Box mx="auto">
      <Text fontSize={[24, null, 28]} textAlign="center">
        {email}
      </Text>
      <Text fontSize={[12, null, 16]} lineHeight="1.2" mt={[40, null, 80]} mx="auto">
        上記のアドレスに確認メールを送りました
      </Text>
      <Text fontSize={[12, null, 16]} lineHeight="1.2" mt={3} mx="auto">
        メールのリンクからアカウントの認証を完了してください
      </Text>
      <Link
        href="/"
        width={[220, null, 280]}
        height={[44, null, 50]}
        borderRadius={[44 / 2, null, 50 / 2]}
        bg="dimgray"
        color="white"
        hoverShadow="silver"
        borderColor="gray"
        borderWidth={1}
        display="flex"
        alignItems="center"
        justifyContent="center"
        overflow="hidden"
        mt={30}
        mx="auto"
      >
        ホームへ
      </Link>
    </Box>
  </Box>
)
次回はログインモジュールの作成を行う。